I have another breakout idea for you. This one is my first creation from scratch and I'm so excited about it! Based on the book The Night Before St. Patrick's Day by Natasha Wing. I've linked to a nice read aloud version on YouTube in the document and the book is less than $3 on Amazon. Your school or local library probably has a copy too if you don't already.
This is a fun way to celebrate St. Patrick's Day and get in some review. The version of this breakout that I share below was made with 2nd Grade students in mind, but you could easily adjust the math tasks or the length of the breakout to fit your students and grade level.
To get your copy of the materials and instructions, Click Here. This is a view only, so you'll need to make a copy to edit it for yourself. Most of it is editable, in the spirit of the intention the creators of BreakoutEdu.
I hope you'll give it a try and please let me know how it goes for you! I'll be trying it out on March 15 or 16, 2017 and will report as well how it went for us.
BreakoutEdu is exploding in classrooms around the world. Based on the breakout rooms popping up in malls, BreakoutEdu is a fun and engaging way for students to review, research and learn. If you haven't heard of it, go check out BreakoutEdu. When you register, free, you'll receive a code so you can access hundreds of breakouts that have been created by teachers at all levels and subjects. There's several Facebook groups for collaboration as well.
I don't have any boxes or locks, but I do have iPads, Kindles and Chromebooks. So, I took this breakout from the blog Primarily Google and put it into a form to digitize it. Now I have a fun themed breakout my students can work through and access. You can access my digital version here where you'll be asked to make a copy so you'll have your own responses and can change the form in any way to fit your needs. The one thing you'll need to know for this, which you could also see in the edit side of the form, is that the code for the crossword is reader, so you'll just have to highlight letters in the crossword that could be unscrambled to make that word clue. I laminated a blank puzzle that I had highlighted, so students just compare their completed puzzle to see which letters they need. That was a whole lot easier than highlighting 25 crossword puzzles. The original crossword for printing and answer key can be found here. Additionally, on the poster, the UV light clue is "The Author".
For the final clue, I have the form set so students have to enter the code in the form and then use it to open the one lock box I have. You can change the directions to fit the lock you have. I had a three digit lock, so I needed three numbers. Information about my lockbox are below. Inside the box, I will place the materials students need to create Cat in the Hat hat headbands. Materials include:
red construction paper
hat templates cut out from tagboard for students to trace (Just freehand a wobbly rectangle and cut it out for students to trace, there are some templates online, but I didn't love any of them.)
white thin strips of construction paper for the stripes (each student needs 2)
white strip that is wider than those above for the head band from large construction paper or butcher paper so that it will wrap around student heads.
I'll add pictures of the hats to this post after my students make their hats.
I'm slowly aquiring the parts for a physical/original breakout experience as I think that has a lot of value too. I aquired a toolbox from Walmart that is 16 inches and probably 5 or 6 inches wide and a bit taller than that. You can find it online here.
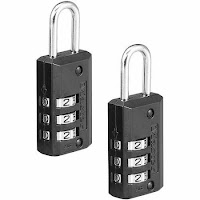
Theres several other options. A toolbox with a place for a lock is a great option as they are inexpensive and vary in size. There were some larger options for less money, but I really liked the look of this one and seemed a bit more treasure like. I grabbed this set of 2 padlocks as well for locking the tool box. I just found that the lock boxes I was finding were small and I wanted a bigger option.
I hope you'll give breakouts a try. I've only done the digital versions, but I think there's a lot of benefit to the tangible locks and boxes, which I hope to aquire over the summer.
If you give this a go, I'd love to hear how this works with your students!
I use QR codes daily, several times a day, in my second grade classroom. QR stands for quick response and they really do elicit a quick response. I get asked often in my building about everything from how to create a QR code to ways to use them. So, I'm creating a mini-series of blog posts about QR codes. We'll begin at the beginning with how to create them and move slowly forward on the many ways I use them. If you prefer a video, you can view a narrated screen-cast of me walking you through the process at the end of this post.
Creating a QR Code
QR codes can be created to point to:
a URL
simple text
a picture
...basically anything stored online can be connected to a QR code.
A popular and easy site for creating QR codes is www.qrstuff.com
This free site doesn't require and information or sign in. It walks you right through the steps to create a QR code.
1. Start with step one and choose the type of data you want the code to point to. Most popular will be either a URL or text.
2. In the text bar enter either the URL or the text. I just copy and paste the URL from the navigation bar of my browser when I am on the site I want to use so I make sure I get it all correct and don't miss type them.
3. Choose a color, I've played with colors a bit because, well, color is fun. You can coordinate your colors and make all math QR codes a color or codes for a center a color, the sky's the limit. However, lighter colors won't be as easy to scan. My ipads seem to scan any color fine, but my Kindle's and especially Chromebooks have a much harder time with the lighter colors.
4. Wait a few seconds for the code to reset. I watch the code and make sure I see it change after clicking the enter button on my keyboard. Once I see the code reset, I know it's updated.
5. Download your code. I click the dark blue button under the code that says Download QR Code. It then downloads to my downloads folder, like anything else you download from online. It's a picture file.
A few tips...
Insert your QR code immediately to your document. I usually use Word or PowerPoint and I open the file immediately after I download it and copy the code picture right from the photo editor that it defaults to open in. Then I paste it directly into the document where I have labeled what the code is.
Here's an example of a PowerPoint I set up for QR codes directing students to audio for my listening center.
The other option is to go right to the folder and rename the code so you know what it is or copy and paste to a new folder destination, also renaming it so you know what it is. If you don't use the code right away or rename it, you won't be able to tell what the code points to.
View the video below to see me walk you through creating a QR code for a URL and for Text.
I've been working in my home office for the last two weeks preparing for my new assignment in second grade this coming school year. In between, I've taken breaks to check out social media. This week several topics have hit my nerves and it's come down to one thing...
Teachers, share your profession!
What I mean by this is that we not only need to educate the students that come to our classrooms and spend 9 months with us, but we need to educate the public about what it means to be an educator.
We need to advocate for ourselves, inform ourselves and educate non-educators about our profession.
I have felt like a lone duck on many threads about education this week as I attempt to share the issues and realities of educators. I can't do it alone and neither can you, but together, we can make a difference in our communities and change the stereotypes and misunderstandings that exist about what it means to be an educator.
Here's how you can make a difference:
We currently have a taxation issue in our district area property taxes and a state wide policy change about licensing people to be educators without education training.
Add positive and informed thoughts to social media threads about education issues that affect you, whether in your own local community or nationally.
For goodness sake, I still talk to people who think they are getting a free private education for their children by sending them to a public state funded charter school instead of their neighborhood school.
Parents and community members don't realize that your classroom library wasn't funded by taxpayers, it came out of your pocket. A gentleman telling me I didn't have to spend money on my classroom was surprised to find out his children wouldn't have a classroom library, center activities, birthday gifts from me, class parties and so on without the money I spend from my income.
Complaining to your colleagues about the state of education doesn't make change. Write letters to your local and state school boards, participate in social media conversations, set neighborhood gossip straight. Be a voice for your profession.
The public is basically our employer and from my perspective, its important for them to be informed about the job they have as employers. Being a teacher means being a public figure. In 2014, there was estimated to be 3.5 million public and private k-12 educators with a total population of 319 million people in the United States, that means K-12 educators make up about 1% of the population.* That's a lot of people who need to know about what it means to be an educator. Instead of hiding in our classrooms, we need to share our profession and help the rest of the world.
What are your ideas about how we can stand together to help our communities better understand education so they can be better informed voters, policy makers and education supporters?
*Statements based on data from: http://nces.ed.gov/fastfacts/display.asp?id=28 http://www.census.gov/popclock/
It's the season when school begins to start all over the U.S. Teachers are back in classrooms getting ready for students, students are awaiting teacher assignments and picking out first day outfits. Some have already started and are in a week or even two and others have a month yet before returning. I begin this Thursday, with students' first day on the following Wednesday, August 19. I've been in my room here and there over the last two weeks to get things organized and set up. This will leave me with my PD days to plan my lessons and not stress about room readiness. I feel lucky that of the 4 days of PD that my district gave us this year, only 2 of them contain meetings. I will have all of Friday to plan, half a day on Monday and half a day on Tuesday. Our meet the teacher time will be Tuesday afternoon, so everything must be ready by 1:00 pm Tuesday!
I'm planning my next few posts to introduce you to my classroom and how I've prepared for students. First tip, make sure you're room is welcoming on the outside, not just the inside. I used the Ecostatic cling white board sheet from shoplet.com on my classroom door to help welcome students to my classroom. My 11 year old daughter was excited to decorated it for me! I love that it clings to my door with static electricity, so does my custodian! Tapes can take the varnish off the doors so it's always a trick as to how to post something welcoming up on the door. This was perfect. I will probably still add some bulletin board border around the sheet to spruce it up a bit. I'll be placing the student desk name tags around the sign for meet the teacher. Students will take their tag off the door and choose their desk and attach the tag to the one they choose. We switch desks at the beginning of each month, so they'll only have their chosen seats for the first two weeks. This time allows me to get to know them and better understand where to seat them in September. It also gives them choice and ownership right off the bat.
It is a little difficult to smooth out, you can still see a few bubbles there. It's easy to clean off if you do so right away, but if you leave the dry erase marker on for more than a few hours, you'll need to use the specialty white board cleaner spray to get the marker off. These will post on any smooth surface, so consider turning your cupboard fronts into whiteboards and windows and doors. These would work great for around the room writing or group work. They're reusable and you wouldn't have to use and throw away large chart pages that are sometimes very expensive.
Ecostatic also makes the cling sheets in smaller notecard sizes. I posted one up on my fridge for reminders. They might come in handy at school near your desk, but I couldn't really think of a reason I'd use the smaller size at school in place of regular sticky notes. Perhaps you can think of some ways you might use them.
Whatever you decide to use to decorate the outside of your room, it's great to have some way to welcome students and families into their new classroom. They'll be spending a lot of time there, and they want to know it's an inviting and comfortable place to be.
How do you decorate the outside of your room to welcome students and families?
Note: shoplet.com sent me the Ecostatic Beginner Kit free to review. Opinions and my use of the product are my own from my experience with the product. Links in this post are not affiliate, they only direct to the shoplet.com website.
However much we might hate to see them, the back to school ads have started. Some of you just finished the last school year and some of us are half way done and others of you are nearly ready for the next year. Wherever you fall on that scale, you'll want to know about these pens that I just discovered. Most teachers I know are suckers for great office supplies, I am one of those suckers. This pen is going to be my go to pen for writing notes and such.
The best thing about these pens? They are manufactured in Germany, but are distributed by one company here in the U.S. that is women owned and operated. They also prefer to hire individuals with special needs that might not otherwise find employment. Those facts alone about this distribution company make this purchase a feel good one.
One of the best things is that there are several different points to choose from, so you can go with the type you like best. The Porous Point Pen is much like a felt tip pen that many of you use. However, it's very thin at 0.8 mm. The wider barrel makes it a dream to hold as you write.
Follow my blog with Bloglovin
The Slider Edge Ballpoint Pen writes very smoothly. It has a triangular shaped barrel which I loved because I love the Ticonderoga triangle pencils. The cap fits snuggly on the end so you won't lose it.
and Slider Memo Pens which come in several colors and would be great for color coding or correcting.
They all write wonderfully, you just have to choose the style of barrel that fits your likes best and then get one!
Happy back to school shopping!
*I received these pens free for evaluation and in exchange for a review from shoplet.com. The review is my own and I receive no other compensation. Links above are not affiliate links.
Mathematical Vocabulary, that's the focus of Chapter 2 of Building Mathematical Comprehension.
There are several ideas on graphic organizers and some bulletin board ideas offered in this chapter. To be honest, I didn't do as well with vocabulary this last year as I had in the past. As I reflected on the year, vocabulary building and instruction was an area I let slip. I know how important it is to teach proper vocabulary to students, especially in mathematics.
One thing that I think was very helpful to me was a professional development where we collaborated vertically with the grade level teams below and above us specifically in the area of vocabulary. We discussed the vocabulary that was currently being used and then suggested vocabulary we'd love for the grade level below us to begin implementing and using. This was very eye-opening to my team as we spoke with the 6th grade team. We learned that there were some key vocabulary terms that if we used in 5th grade, would be tremendously helpful to students in 6th grade as they deepen their level of mathematical knowledge.
I would strongly encourage you to get with the grade level teams ahead of, and behind your own and have a vocabulary conversation. It can be informal and take just a few minutes. You might be surprised at what you discover either about your own instruction or the instruction that might be happening before your students arrive in your classroom.
I think it's extra important for primary grade teachers to use correct vocabulary. As a first grade teacher, I was certainly guilty of using "simple" names for math terms because I thought the true vocabulary words would be too difficult. I soon realized that if taught correctly and used over and over, young students can understand the vocabulary just fine and it sets them up to be more successful in the future.
One of my summer tasks is to create a template/master of a student interactive math notebook to guide me through next year. Vocabulary will be a strong part of that notebook.
How do you make sure your students get explicit math vocabulary instruction? Be sure to check out the other posts on Chapter 2 linked up below.